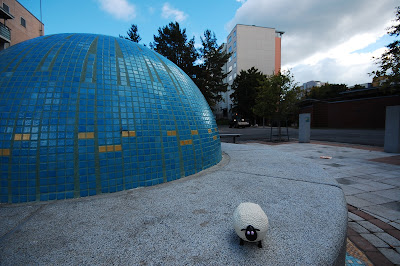
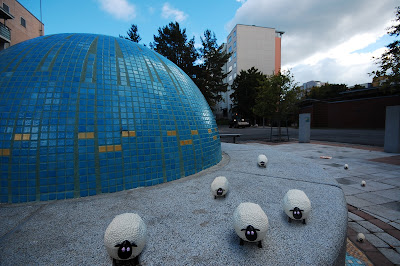
So, what we'll be doing is... multiplying sheep!
 |
| This poor guy looks so lonely. Let's add some friends for him! |
1. Open your image. Some kinds of objects behave better when cloned than others. Generally speaking, it's best to have some texture underneath (e.g. sea, grass, sand, or the stone in the example photo). If you want to play it safe, duplicate the layer and work on the copy.
2. Use the Lasso Tool and select the area around your object. Do include some of the surrounding texture (in other words, don't be accurate with your selection, and don't select only the object). Feather should be used; the exact value depends on the size of your selection/selected image. I used 10.
3. Select the move tool (shortcut key: V) and keeping pressed Alt, drag the selection to the place you want to clone it.
4. Keeping pressed Shift, grab the corner of the transform box and drag to make it smaller (in order for the effect to be realistic, objects further away should appear smaller). The Shift button is used to keep the proportions unchanged. Apply the transformation ticking the appropriate button (if you don't, you will be asked to do so attempting to move on to the next step)
5. Now things get interesting! Select the Patch Tool, click on the "Destination" option, and drag your selection just a bit. This will be enough for the Patch Tool to apply the proper algorithms to blend the object with the background seamlessly. Try it! If there are still some inconsistencies, you can use the eraser or clone tool to make minor adjustments (if there is an evenly textured background, there shouldn't be any inconsistencies). CTRL + D removes the selection
6. Repeat until you're happy with the result. To enhance the clones, you can even try to experiment with their orientation, perspective, and other tools available to you.
Here's the final result. Beat that, North Korea! :D
 |
| Much baaa-ter! |

No comments:
Post a Comment